安装驱动
下载epson驱动包到本地。然后执行安装命令 sudo dpkg -i epson-inkjet-printer-escpr_1.8.6-1_amd64.deb。如果有以下报错则需要先修复libzmq5的软链接
/sbin/ldconfig: /usr/local/lib/libzmq.so.5 is not a symbolic linkProcessing triggers for libc-bin (2.36-9+deb12u13) ...
ldconfig: /usr/local/lib/libzmq.so.5 is not a symbolic link
修复libzmq5库文件软链接
先尝试通过apt安装libzmq5
sudo apt update
sudo apt install libzmq5 -y
如果返回是已安装,文本如下
Reading package lists... Done
Building dependency tree... Done
Reading state information... Done
libzmq5 is already the newest version (4.3.4-6).
libzmq5 set to manually installed.
0 upgraded, 0 newly installed, 0 to remove and 41 not upgraded.
则需要手动修改对应文件的软链接。先备份原有文件,然后重新生成软链接文件并刷新依赖配置
sudo mv /usr/local/lib/libzmq.so.5 /usr/local/lib/libzmq.so.5.bak
[ -f /usr/local/lib/libzmq.so ] && sudo mv /usr/local/lib/libzmq.so /usr/local/lib/libzmq.so.bak
sudo ln -s /usr/lib/x86_64-linux-gnu/libzmq.so.5 /usr/local/lib/libzmq.so.5
sudo ln -s /usr/lib/x86_64-linux-gnu/libzmq.so.5 /usr/local/lib/libzmq.so
sudo ldconfig
最后再执行安装驱动包sudo dpkg -i epson-inkjet-printer-escpr_1.8.6-1_amd64.deb,返回如下信息则说明安装成功
(Reading database ... 73989 files and directories currently installed.)
Preparing to unpack epson-inkjet-printer-escpr_1.8.6-1_amd64.deb ...
Unpacking epson-inkjet-printer-escpr (1.8.6-1) over (1.8.6-1) ...
Setting up epson-inkjet-printer-escpr (1.8.6-1) ...
Processing triggers for libc-bin (2.36-9+deb12u13) ...
安装CUPS
安装服务
sudo apt-get install cups -y
修改配置文件,允许访问相关页面和配置文件
sudo nano /etc/cups/cupsd.conf
找到监听地址
Listen localhost:631
修改为Listen 0.0.0.0:631
找到以下四段文本,都在其内部添加Allow all
# Restrict access to the server...
<Location />Order allow,deny
</Location># Restrict access to the admin pages...
<Location /admin>Order allow,deny
</Location># Restrict access to configuration files...
<Location /admin/conf>AuthType DefaultRequire user @SYSTEMOrder allow,deny
</Location># Restrict access to log files...
<Location /admin/log>AuthType DefaultRequire user @SYSTEMOrder allow,deny
</Location>
修改后内容如下:
# Restrict access to the server...
<Location />Order allow,denyAllow all
</Location># Restrict access to the admin pages...
<Location /admin>Order allow,denyAllow all
</Location># Restrict access to configuration files...
<Location /admin/conf>AuthType DefaultRequire user @SYSTEMOrder allow,denyAllow all
</Location># Restrict access to log files...
<Location /admin/log>AuthType DefaultRequire user @SYSTEMOrder allow,denyAllow all
</Location>
然后保存退出
添加当前用户到cups的管理员组
sudo usermod -a -G lpadmin $USER
重启cups服务
sudo systemctl restart cups
添加打印机
首先保证usb连接打印机到主机
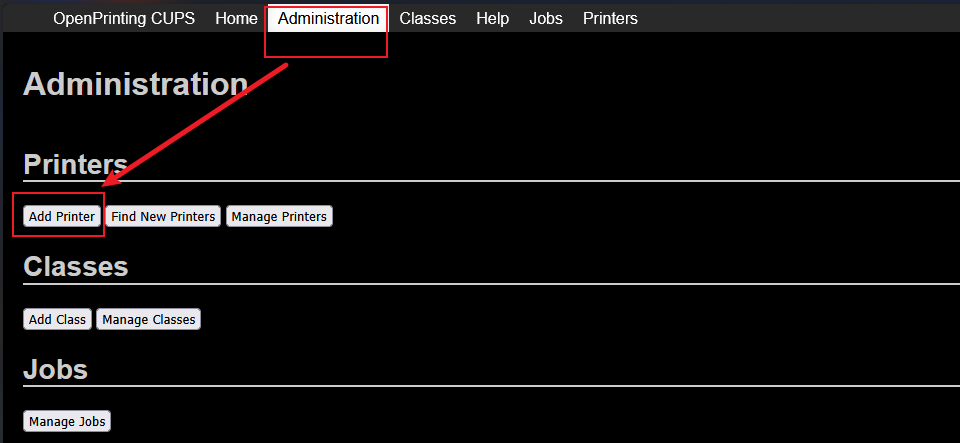
然后访问管理页面 http://{飞牛主机ip}:631 ,点击Administrator--Add Printer, 弹出登录窗口就输入飞牛的用户名密码即可
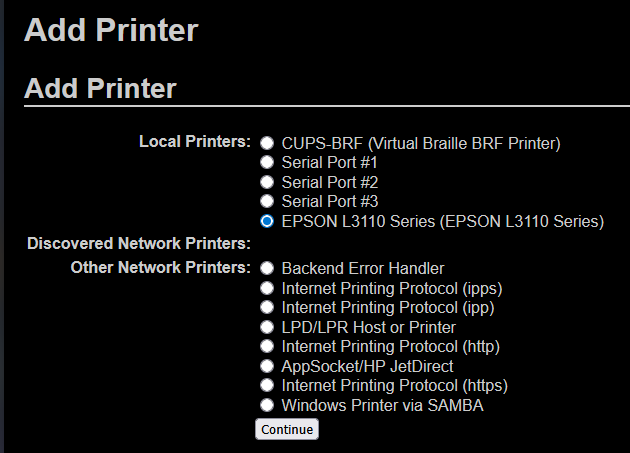
选择识别出的打印机,点击continue
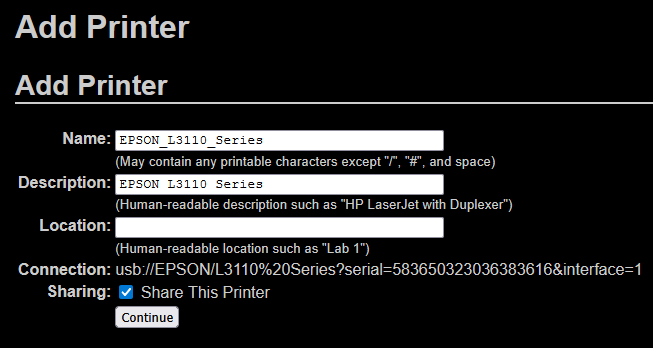
勾选share This Printer, 其他保持默认,直接点continue
最后选中第一个识别出来的L3110驱动,点击Add Printer
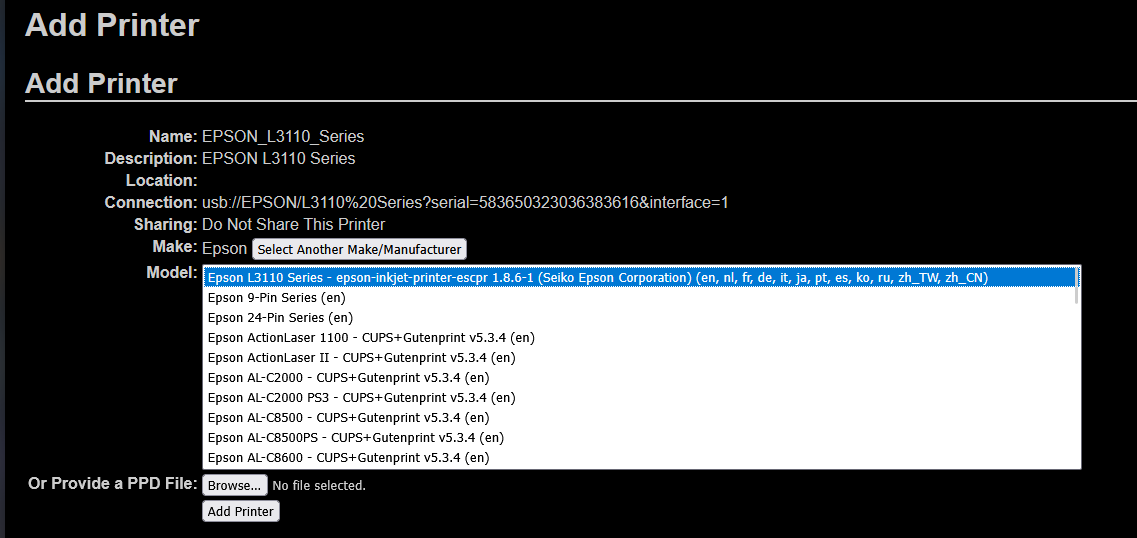
至此完成对L3110打印机的添加。
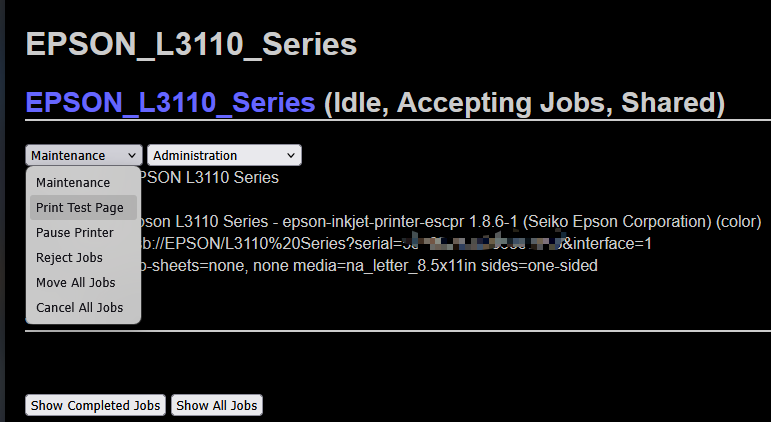
可以到 https://{飞牛主机i}:631/printers/EPSON_L3110_Series 的管理界面中选择打印测试页查看是否打印成功